Preparing Polyurethane Sealant Before Using
Preparing Polyurethane Sealant Before Using
Surface Cleaning (Critical!):
Removing Dirt: Use a wire brush, sandpaper, or scraper to thoroughly remove dust, oil, rust, old paint, release agent, water stains, frost, loose particles, and any other contaminants that could affect adhesion, both inside and on both sides of the joint (generally 15-25mm per side).
Solvent Cleaning: Use a clean, lint-free cloth dampened with a dedicated solvent (such as isopropyl alcohol, acetone, or a cleaner recommended by the manufacturer) to thoroughly wipe the surfaces to be bonded to remove grease and residue. Ensure adequate ventilation and keep away from sources of ignition! The solvent must evaporate completely before proceeding to the next step.
Special Substrates: For porous substrates (such as concrete and stone), a primer may be required to improve adhesion and prevent air bubbles. Always follow the primer’s instructions and allow the primer to dry before applying the sealant.
Joint Preparation:
Design: The joint width and depth should meet design requirements. Typically, the width should be between 6mm and 40mm, and the depth is recommended to be approximately half the width (minimum 6mm), achieving a reasonable thickness-to-width ratio.
Backing Material: For deeper joints (typically greater than 10mm in depth or greater than 25mm in width), a closed-cell backing material (such as polyethylene foam rods or rubber strips) must be used. Its functions are:
Control the sealant application thickness (avoiding three-sided adhesion).
Provide support, allowing the sealant to form an ideal “dumbbell-shaped” cross-section (two-sided adhesion), facilitating stress relief.
Conserve sealant usage.
Caulking: Tightly insert the backing rod into the bottom of the joint. The diameter should be slightly larger than the joint width (approximately 20-25% larger) to ensure a secure fit. The caulking depth should ensure that the final sealant thickness meets the required level (typically no less than 6mm).
Applying Anti-fouling Tape:
Apply masking tape or specialized anti-fouling tape to the substrate on both sides of the joint, ensuring that it covers any areas that may be contaminated by the adhesive. This ensures a neat, aesthetically pleasing edge after application and avoids later cleaning difficulties. Remove the tape after application and before scraping.
Tools:
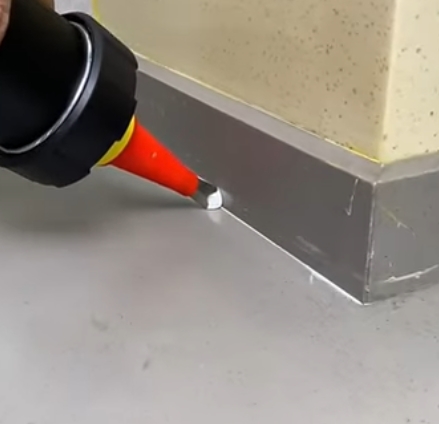
Hand or pneumatic sealant gun: Used to extrude sealant.
Specialized nozzle cutter or utility knife: Used to cut the nozzle.
Nozzle: The size should be selected based on the joint width; the shape of the opening (beveled or flat) affects the application quality.
Scraper/tongue depressor: Used to scrape and compact the sealant, ensuring full contact with the substrate and creating a smooth surface. The scraper shape should match the joint shape.
Gloves: Wear protective gloves (such as nitrile gloves) to avoid skin contact with uncured adhesive.
Other supplies: Rags and cleaning solvent (on standby).